2
Bay of Death Part 2:
Devils From Sky and Sea
The deck under your feet has become a crimson slick. Your companions grin mirthlessly, chests heaving, their clothes red and gleaming like those of butchers. Over your own haggard breaths peal the cries of dying men who lie scattered at your feet. Your arms ache from a flurry of fierce strokes, but your nerveless hands yet grip steel. As you take in the grim scene, a fiery glow and whiff of burning wood reveal an awful truth: the ship is on fire.
Worse yet, a winged black form materializes in the hooded sky above. Bobbing in the air like a bat but man-like in proportions, the vile creature descends on the ship, eyes
burning with eldritch light. Over the sides of the stern, painted faces peer at you. A Pictish swarm is scaling the ship, apparently unfazed by the demon. It seems the devils of the forest have allied themselves with a devil from the Outer Dark, and the deck of your once-glorious vessel has become a hellscape.
As you take position, steeling yourself for the coming attack, you are forced to stifle a maniacal laugh. Have you lost your mind, or are the once-dead pirates—men you hacked to ribbons only moments ago—rising from the deck?
Objective
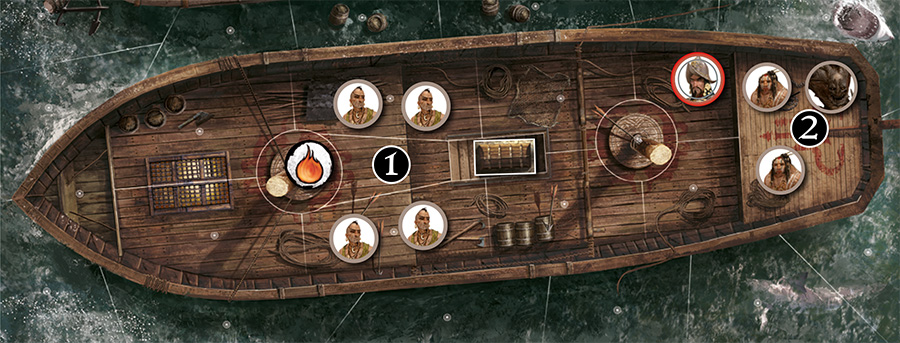
The Heroes win if they drop 5 chests in the zone marked  and
there are no enemies present in that zone.
and
there are no enemies present in that zone.
The Heroes don’t need to be present in to meet these victory
conditions.
Setup
| The game starts with the Heroes’ turn. The Heroes deploy in the reinforcement zone. |  |
Set the Fire tokens on the table for use in this scenario.

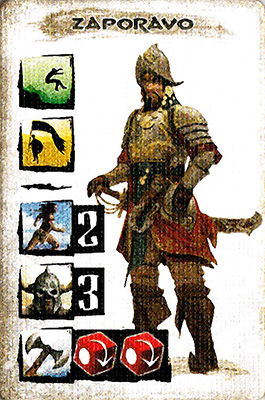
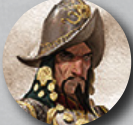
If the Heroes lost the previous scenario, Zaporavo will continue to pose a threat. Place him on the map as indicated, but do not assign his tile an Activation token.
 |
After setup, each Hero moves 3 gems from their Reserve zone to their Fatigue zone. If they lost the previous scenario they must move 4 from Reserve to Fatigue. |
Asset Deck
Heroes do not have time to open chests during the scenario. After the scenario, they will have the option to acquire some or all of the following items and spells: Telekinesis, Akbitanan Sword, Explosive Orb, Parrying Dagger, and Bossonian Bow, Spiked Shield.
Event
There are two events in this scenario. Activate only the event with the corresponding number and complete all parts of the event in the order presented.
Event 1:
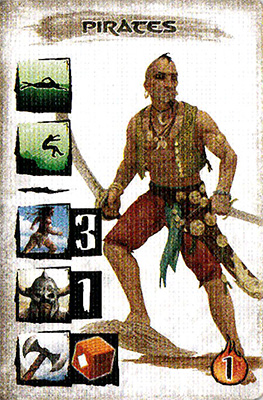
- The Dead Return: The Dead Return: Up from the blood-soaked deck rise the fallen
pirates, burning with unnatural life. Roll
 to determine how
many pirates arise. Reroll the die once if the first result is blank. Add the Pirates to area
to determine how
many pirates arise. Reroll the die once if the first result is blank. Add the Pirates to area
 or ,
whichever is closest to the Target Hero. If they would not be able to reach the
Target the Hero from either zone, place them in the zone that would allow them to attack an. Alternate Target Hero. If neither
is possible, players choose which of the two areas to place them in. If there is a Fire token in ,
pirates will no longer spawn there and will spawn in , where Fire tokens
may not be placed. A maximum of 15 Pirates can be on the board at one time. Once the pirates are placed, activate them.
or ,
whichever is closest to the Target Hero. If they would not be able to reach the
Target the Hero from either zone, place them in the zone that would allow them to attack an. Alternate Target Hero. If neither
is possible, players choose which of the two areas to place them in. If there is a Fire token in ,
pirates will no longer spawn there and will spawn in , where Fire tokens
may not be placed. A maximum of 15 Pirates can be on the board at one time. Once the pirates are placed, activate them. - Zaporavo Yet Stands: Activate Zaporavo after the pirates have activated. He no longer has the Protected skill, as the dead do not obey him. His tile functions as printed.
- Fire Arrows: Roll to see if a Fire token is added to the map (see Fire! under special rules).
Event 2:
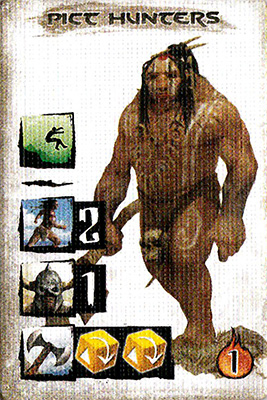
- Enter the Pictish Horde: The sharks have mysteriously vanished and now the water is
teeming with Picts, some of whom are already climbing the ship. Roll
to determine the number of Pict Hunters you will place in .
Reroll the die once if the first result is blank. A maximum of 15 Pict Hunters can be on the board at one time. Picts do not
activate as part of this event.
- Fire Arrows: Roll to see if a Fire token is added to the map (see Fire! under special rules).
Special Rules
Fire! The invading Picts started a fire on your ship. Roll
to determine the fire’s
intensity (shown as a 1, 2, or 3 on the Fire token). Reroll the die once if the first result is blank. Unless the reroll
is also blank, place the initial Fire token in any zone except
or the stairwell (marked with a chest). Subsequent Fire tokens must be placed in a zone adjacent to an existing Fire token.
The number on the Fire token denotes how many unprevent- able wounds a miniature takes if they move into a Fire zone, as well as any round they start in a zone with a Fire token. Each unit already in a zone when a Fire token is placed in that zone immediately takes 1 unpreventable damage. Overlord miniatures will always avoid zones with a Fire token when moving. If there is no way to reach a Target Hero or Alternate Target Hero, they will remain in their current zone when they activate (even if they have Leap).
Leaping the Flames: A Hero with Leap may leap over one zone containing a Fire token to an adjacent zone. Follow the rules for Leap by considering each zone with a Fire token to be a leap area. The number on the Fire token is the number they must match or beat by the red die roll. A Hero may never leap more than one zone as part of the same action.
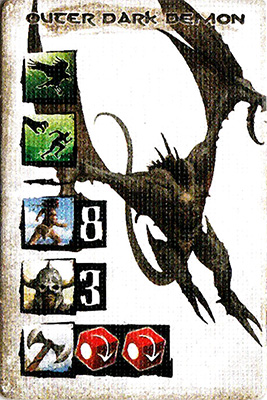
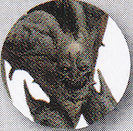
Outer Dark Demon: The Pictish sorcerer has summoned a vile demon from the Outer Dark. The Outer Dark Demon is unaffected by Fire tokens. The Outer Dark Demon will target the Strongest Hero.
Chests: Place one chest in the stairwell zone of the ship to indicate where Heroes pick up chests. This chest does not affect how many miniatures you can place in the zone (3 normal-sized miniatures is the threshold). A Hero in this zone may spend one gem for a simple Manipulation to retrieve a chest. This chest counts as two encumbrance and may be dropped for free or picked up again as a simple Manipulation. A Hero may only hold one chest at a time and may not throw the chest.
The stairwell zone: Only area
and the adjacent mast zone have line of sight to units in the stairwell zone.
Options
Non-Campaign Mode
Zaporavo is alive in this scenario and players move 4 gems to their Fatigue zone during setup.
Cache: Buckler, Cutlass, Dagger, Leather Armor, Sword, Throwing Knives
Cache for 4 Heroes: Add Tribal Mace and Shield
Spells: Bori’s Rage, Set’s Halo
Four Player Mode
- After setup, Heroes move 4 gems from their Reserve to their Fatigue zone, 5 if they lost the previous scenario.
- The Outer Dark Demon has 14 Life Points (Winged One has 8 - see substitutions below).
- Heroes must place 6 chests in zone 2 rather than 5.
- For the “Death From Below Deck” Event, roll
- Pirates have the Untouchable skill.
- Reminder: The Overlord activates four times per turn.
Substitutions
- The Winged One may substitute for the Outer Dark Demon with 6 Life Points instead of 10.
- Hard Mode: Replace the Pirates in the River with the Kickstarter stretch goal Pirates.
|
|
|

|

|
|||
 |
 |
 |
 |
 |
 |
||
12
|
3
|
Hero Victory: Heroes are rewarded one Victory point per surviving Hero and may add the items in the Asset Deck to their Stash. Additionally, players may also add any items not obtained in the first scenario to their Stash.
Hero Defeat: Each player can choose one piece of equipment from the Asset Deck to add to their Stash.