6
Infernal Abode
Moonlight glitters upon the placid water of a small bay. Jagged cliffs encircle it, shaped like a horseshoe, offering protection from the turbulent sea beyond. Its mouth is sealed off with a thick length of chain, preventing passage in or out, but a look around the decaying village suggests none have visited this port for many years. Despite your scouting efforts, it remains unclear who the original denizens were. Fishermen? Was this a military fortification? A pirate refuge? In such disrepair are the structures that the port’s original purpose cannot be determined.
But that is of little concern. What matters is the ship still afloat on the sparkling water, its rigging and sails intact. If you can but loose that chain, you should be able to sail south
along the Western shore and back to civilization without further aggression from the devils of the forest. The links of the chain are mighty, made to withstand any handheld weapons, but with the right tools, you should be able to release the lock and sail to freedom.
One of the decayed buildings catches your eye. The soft glow emanating from its shattered windows would be welcoming if the rest of the scene wasn’t so damned foreboding. If there’s any chance of finding the tools to drop that chain, you expect to find them there. Besides, the familiar howls from beyond the tree line—the awful peal of man-eating ghouls—makes the gloomy structure a bit more appealing.
Objective
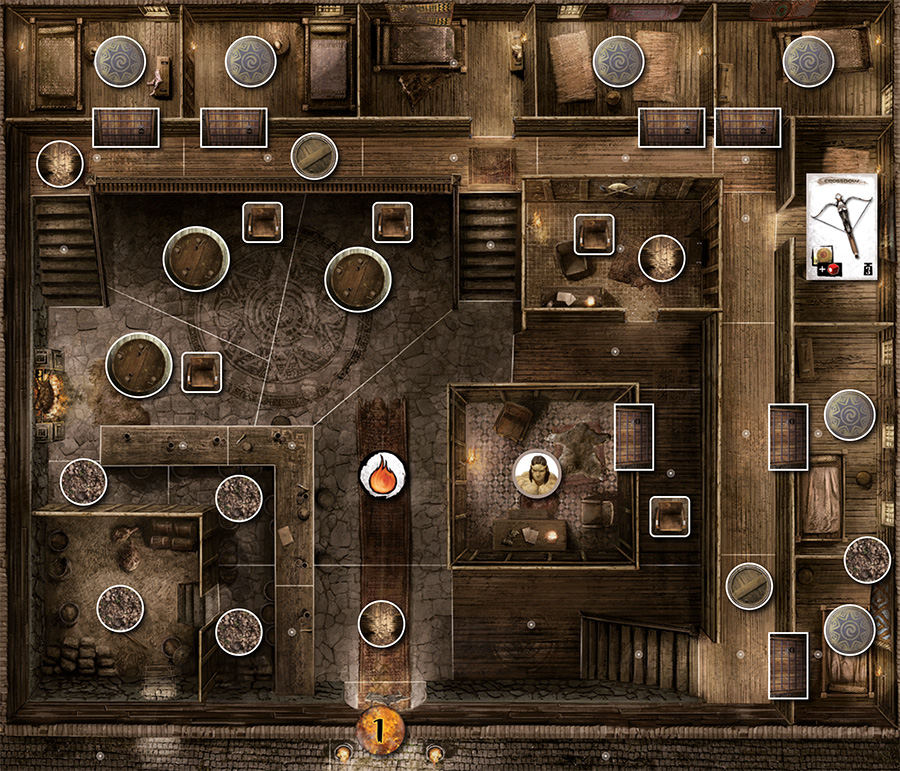
The Heroes win the game once a Hero with the Tools equipment card moves into the zone marked
 .
.
Setup
The game starts with the Heroes’ turn. The Heroes deploy in the reinforcement zone  .
.
Place the Table, Chair, and Barrel tokens as indicated. In addition, place the Wall Wrecker tokens to act as Breach tokens (see Breach section in Special Rules).
 |
After setup, each Hero moves 4 gems from their Reserve zone to their Fatigue zone. |
Asset Deck
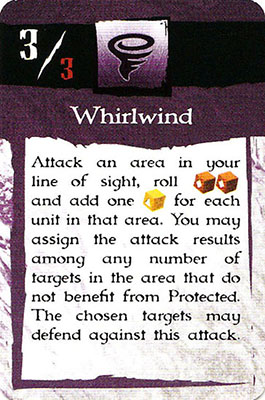
There is no Asset Deck in this scenario. However, set the Yuetshi Knife, Spellbook (Whirlwind), Key, and Tools equipment cards near the Player area, since they will be used in the scenario. Also, set aside Scale Mail, Anchor, and Gift of Life as the rewards for success.
Special Rules
This scenario works differently than most scenarios. Activation tokens are not used to activate units, but rather to randomly choose which units spawn. The number of acti- vations does not depend on how many Heroes are on the board. The Overlord turn always goes as follows:
Overlord Turn Sequence
- Roll for Event effects and complete steps and associated activations (see below)
- Activate all revealed enemy units. Players choose the order in which to activate these units.
- Activate all revealed monsters (those that have been revealed behind doors; see Doors below), but not the Ghouls—they only attack during the Event. Players may choose the order of these attacks. Determine Target Hero or Alternate Hero for each activating monster as normal.
Map notes: Areas with a Boulder token are inaccessible and can’t be entered by any means (including Intangible). Wall Wrecker cannot be used in this scenario.
Breach, Table, Chair, and Barrel Tokens: The areas with Breach tokens serve as entry zones for Ghouls. Heroes carry- ing a Table, Chair, or Barrel token may perform a simple Manipulation to plug the breach by placing the token on top of a Breach token. Only one token may be on top of a Breach token at a time. When Breach tokens are covered in this way, Ghouls can no longer enter this area via the event.
Heroes may perform a simple Manipulation to pick up a Table, Chair, or Barrel token, each of which have an encumbrance of 2. They may be dropped any time for free. If you attack or are attacked while holding one of these tokens, you may add one to your Defense for the round, but must drop it in your area after the attack is resolved. You must also drop one of these tokens to make an attack.
When a Table, Chair, or Barrel token is removed from a Breach token, remove it from the game.
Doors and Monsters: Doors require a simple Manipulation to open. Each time a door is opened, draw an Activation token and follow the instructions according to the corresponding number.
Ghouls: Ghouls follow the standard activation rules but only activate as dictated by the Event. Their tile should not be placed in the River. Ghouls have one life point each.
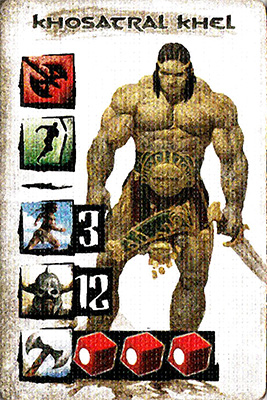
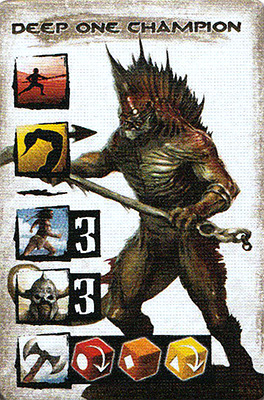
Khosatral Khel: Khosatral Khel does not activate until his door is opened. A Hero who
possesses the Key can open this door by performing a simple Manipulation. When the door is opened, roll
 . If the result is 2 or greater, activate Khosatral Khel and target
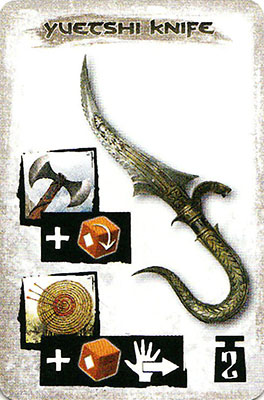
the Hero who opened the door. Khosatral Khel is immune to damage caused by spells. A Hero who attacks Khosatral Khel with the
Yuetshi Knife reduces his armor to 6 for that attack. When he’s killed, place the Tools Equipment card in his zone.
. If the result is 2 or greater, activate Khosatral Khel and target
the Hero who opened the door. Khosatral Khel is immune to damage caused by spells. A Hero who attacks Khosatral Khel with the
Yuetshi Knife reduces his armor to 6 for that attack. When he’s killed, place the Tools Equipment card in his zone.

3
 |
The door sticks as you try to open it, but with a bit of weight behind your push it swings wide and you stumble
into the room. On the far wall, a great shattered window washes the chamber in eldritch moonlight. Curious gossamer wisps
sway from the ceiling. Distracted, you do not initially spot the massive hairy monster clinging to the ceiling, watching
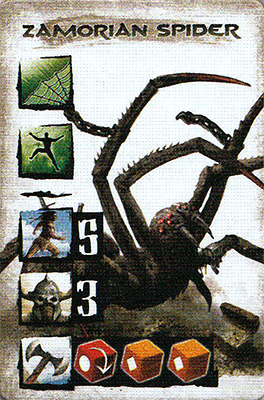
you with eight hateful eyes. Place the Hero who opened the door inside the room, along with a chest, the Zamorian Spider, and a web token. Add the Zamorian Spider’s tile to the River and roll . If the result is
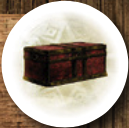
2 or greater, activate the Zamorian Spider and target the Hero in the room. Otherwise, the Hero may continue his activation.To leave an area with a Web token, any unit other than the Zamorian Spider must spend two extra movement points. The chest requires a complex manipulation of 3 to open. Inside the chest is the Yuetshi Knife. |
|
 6
6 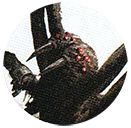
 |
The roof groans as you open the door, and a great rumble shakes the building. All units in the area with the Hero who opened the door must successfully Defend against an attack of 3 hits. You may not use Parry to Defend, but you may use a Shield. If they succeed, place them in an adjacent area of their choice. If a unit sustained damage, they remain in their area. |
|
|

 |
The door opens, shrieking on rusted hinges. Inside is...nothing. A breeze howls from unseen cracks, disturbing dust and debris. There is nothing of significance in the room. |
 |
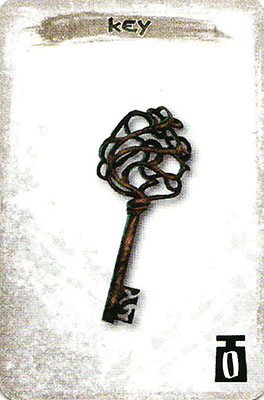
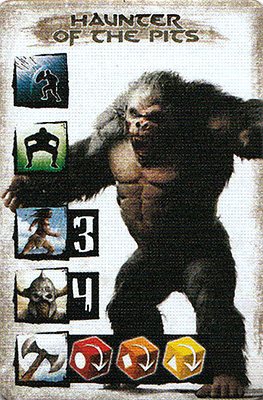
The Hero who opens this room is seized by a steely grip and wrenched inside the room. Place the Haunter of the Pits, a chest, and the Hero who opened the door inside the room. Roll . If the result is 2 or greater, activate the Haunter of the
Pits and target the Hero it pulled into the room. Otherwise, the Hero can continue their activation. The chest
requires a complex Manipulation with a difficulty of 3 to open. Inside the chest is the Key. This key is used to
open the door of the room with Khosatral Khel.
|
|

Event
The Event activates once at the beginning of every Overlord Turn. To determine what happens, roll .
If the roll result is a blank, remove a table, chair or barrel token from one Breach token in any zone (players’ choice). Next, activate all Ghouls.
If the roll result is one, place 1 Ghoul in every zone that contains and uncovered Breach token. Only 8 Ghouls may be on the board at any one time. Next, activate all Ghouls.
If the roll result is a two, place 2 Ghouls in all zones contain- ing uncovered Breach tokens. Distribute them evenly as possible. Players choose where to place any odd numbers.
Only 8 Ghouls may be on the board at any time. Do not activate the Ghouls this round.
If the roll result is three,
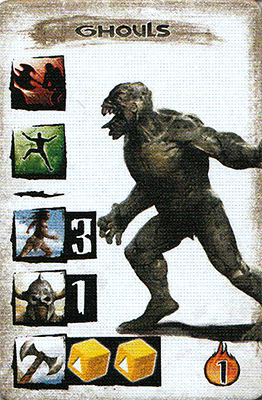 remove all table, chair or barrel tokens covering Breach tokens.
Next, place 2 Ghouls in each zone containing a Breach token. Distribute as evenly as possible. Players choose where to place any odd
numbers. Only 8 Ghouls may be on the board at any time. Next, activate all Ghouls.
remove all table, chair or barrel tokens covering Breach tokens.
Next, place 2 Ghouls in each zone containing a Breach token. Distribute as evenly as possible. Players choose where to place any odd
numbers. Only 8 Ghouls may be on the board at any time. Next, activate all Ghouls.
For this event, use the following Ghoul tile:
Options
Non-Campaign Mode
Heroes may choose one Boon from the options listed in the Hero Victory section on page 32.
Cache: Akbitanan Sword, Atlantean Axe, Bossonian Bow, Buckler, Chain Mail, Cutlass, Dagger, Heavy Spear, Leather Armor, Parrying Dagger, Shield, Sorcerer’s Scepter (see page 22), Spiked Shield, Sword, Throwing Knives, Tribal Mace
Spells: Bori’s Rage, Born by the Wind, Mitra’s Healing, Pestilential Swarm, Set’s Halo, Summon Demon (Outer Dark Demon), Telekinesis, Ymir’s Retribution, Yog’s Hunger
Four Player Mode
- After setup, each Hero removes 5 gems from their Reserve zone to their Fatigue zone.
- All monsters revealed in rooms have 8 Life Points. There may be up to 10 Ghouls on the board at one time.
Substitutions
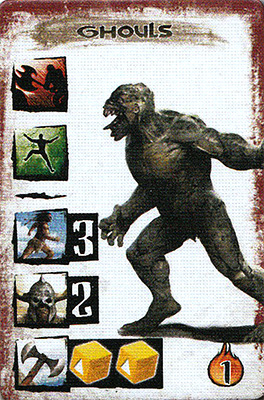
- Hard Mode: Replace the Ghouls from the Event with this Ghoul tile:
Discard the Tools equipment card. It does not carry over to the next scenario.
Hero Victory: If the Heroes win, they are awarded 1 Victory Point per surviving Hero and they may add the Scale Mail, Anchor, and Gift of Life spell to their Cache.
Hero Defeat: If this scenario results in a Defeat, lose one Victory Point. They may choose 1 of these items to add to their Cache.